Black Ribbon Halloween Wreath on a Wire Frame
Knot strips of black and accent ribbon onto a flat wire frame to build a full, ruffled Halloween wreath, with rough ribbon amounts by frame size and tips for mixing textures.
Tutorial at a glance
Materials
- Flat wire wreath frame, 12 to 14 inches
- Black ribbon in mixed widths, about 25 to 35 yards
- Orange or purple accent ribbon, about 12 to 15 yards
- Sharp fabric scissors
- Cardboard strip for measuring
- Black cardstock and floral wire for bats (optional)
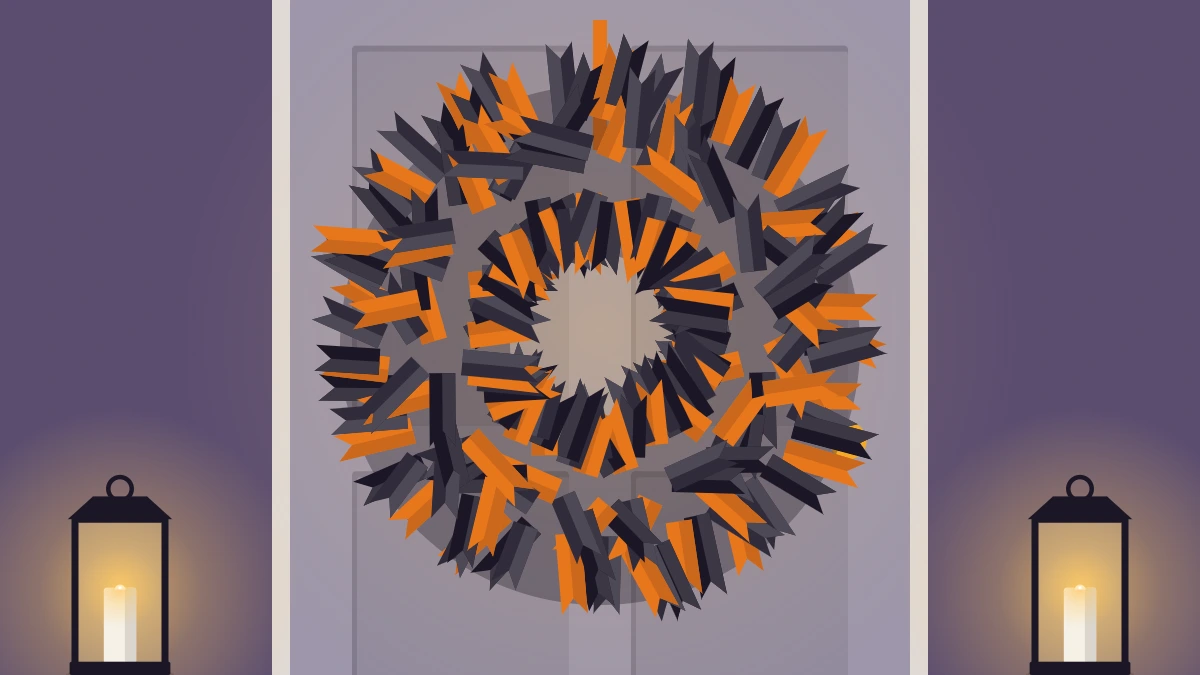
A ribbon halloween wreath is one of the most forgiving door projects you can make. There is no glue, no sewing and no pattern to follow: you cut ribbon into short strips and knot them onto a wire frame until the metal disappears under a thick, ruffled ring of black.
The work is repetitive in a pleasant way, so it suits an evening on the sofa. If you have never built a wreath before, the guide to choosing a wreath base and hanger explains the frame types, and this page takes over from the moment you have a flat wire frame in your hands.
What you need
- A flat wire wreath frame with three or four concentric rings, about 12 to 14 inches (30 to 36 cm) across
- Black ribbon in two or three widths and textures
- One accent ribbon in orange or purple
- Sharp fabric scissors
- A ruler or a strip of cardboard cut to your strip length
- Optional: a few black cardstock bats and thin floral wire, or extra ribbon for a bow
Pick one accent color and stay with it. Three colors tend to look busy once several hundred ribbon ends are fluffed out.
How much ribbon to buy
The amount depends on the frame size, the ribbon width and how tightly you pack the knots, so treat these figures as a rough starting point and buy a little extra of the main black ribbon.
| Frame size | Approximate strips | Approximate ribbon |
|---|---|---|
| 12 inches (30 cm) | About 150 to 180 | Roughly 35 to 40 yards (32 to 37 m) |
| 14 inches (36 cm) | About 190 to 230 | Roughly 45 to 50 yards (41 to 46 m) |
| 18 inches (46 cm) | About 260 to 300 | Roughly 60 to 70 yards (55 to 64 m) |
These numbers assume strips of about 8 inches (20 cm) in ribbon roughly 1 to 1.5 inches (2.5 to 4 cm) wide. Narrow ribbon fills less space per knot, so you will need more strips of it.
Mixing widths and textures
A wreath made from one plain ribbon looks flat. Mixing a few surfaces is what gives the finished ring its depth, and all of them can still be black:
- Grosgrain holds its shape and makes crisp, upright tails.
- Satin catches the light and adds a soft shine.
- Sheer organza or tulle ribbon adds volume without weight.
- Wired ribbon stays where you bend it, which helps on the outer ring.
- Burlap or woven ribbon gives a rougher, rustic edge.
A simple recipe is about two thirds black in mixed textures and one third accent.
Cut the strips
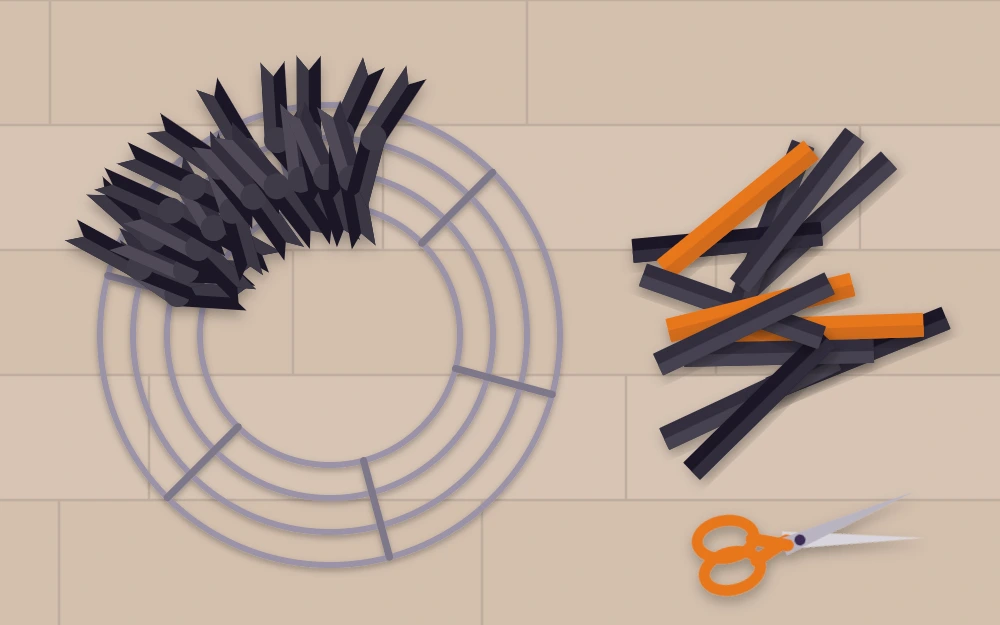
Cut everything before you tie anything. Wrap ribbon around a piece of cardboard about 4 inches (10 cm) wide, then snip through all the loops along one edge. Every strip comes out close to 8 inches long, and you avoid measuring each one.
Sort the strips into piles by ribbon type so the mix stays even as you go around the frame.
Tie the ribbon onto the frame
- Lay the frame flat with the curved side facing up. The cross wires divide it into sections; work on one section at a time.
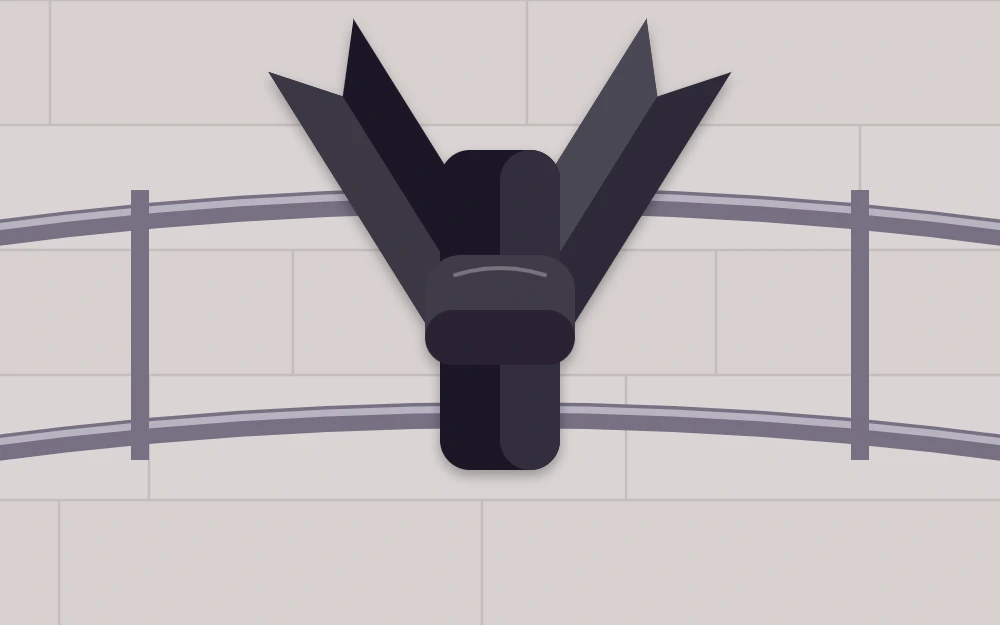
- Slide a strip under the two innermost rings so that both rings sit in the middle of the strip.
- Bring the ends up and tie one plain overhand knot, the first half of tying a shoelace. Pull it snug so the knot sits on top of the wires.
- Tie the next strip over the middle pair of rings, and the next over the outer pair. Repeat in that order, changing ribbon type every knot or two.
- After every eight to ten knots, push them along the wires toward the last cross wire. Packing them tight is what hides the frame.
- Drop in an accent strip about every third knot, or cluster the accents in two or three patches for a bolder look.
- Continue section by section until you are back where you started and no wire shows from the front.
Tip
A single knot holds well on textured ribbon. Slippery satin can work loose, so give those strips a second knot on top of the first.
Fluff and trim
Hold the wreath up and shake it gently. Then go around it with your fingers, pulling the tails apart so they point in different directions instead of lying in rows. Turn it over and check the back: tails that have slipped behind the frame can be pulled through to the front.
Now trim. Cut each tail at an angle, or fold the end in half lengthwise and cut diagonally toward the fold to make a small V notch. Shorten any tail that sticks out far past its neighbors so the ring stays round.
Finishing touches
The wreath is complete as it is, but one focal point makes it look deliberate.
- A bow: tie a large bow from the widest ribbon and wire it at the bottom or slightly off center.
- Paper bats: cut three to five small bats from black cardstock, tape a short piece of floral wire to the back of each and tuck them between the knots so they hover just above the ribbon.
- A hanging loop: tie a strip of ribbon around the top of the outer ring at the back.
If you like the idea of a lighter, more open design for another door, the spider web wreath on an embroidery hoop uses yarn instead of ribbon and makes a good partner.
Hanging and care
Ribbon and cardstock do not enjoy rain, so this wreath is best on an indoor door, a wall, or a front door that sits under a porch roof. Hang it from an over-the-door hanger or a removable adhesive hook at a height you can reach from the ground. Bring it inside in wet or windy weather, and leave the paper bats off if the spot is at all damp.
For ideas on what to place around the door, see the guide to Halloween entryway decor.
After the season, lay the wreath flat in a box with tissue paper over the top instead of hanging it in a crowded closet. How well it keeps its shape varies with the ribbon, so check it when you unpack it the next year and fluff the tails again before it goes back on the door.
Frequently asked questions
How long should the ribbon strips be for a tied wreath?
Strips of about 8 inches work well on most flat wire frames. That length leaves two tails of roughly 3 inches after the knot, which is enough to fluff and trim. Go a little longer, around 9 to 10 inches, for very wide or stiff ribbon so the knot does not use up the whole strip.
Can I use fabric strips instead of ribbon?
Yes. Cotton fabric torn or cut into strips about 1 inch wide ties onto the frame in exactly the same way and gives a softer, more rustic look. The edges will fray a little, which suits the style. You can also mix fabric strips with ribbon to stretch a small supply of ribbon further.
Why can I still see the wire frame through the ribbon?
The knots are usually not packed tightly enough. Slide each group of knots firmly along the wires toward the nearest cross wire, then add more strips in the space you open up. Wider or fuller ribbon on the outer ring and a final round of fluffing also help to cover any wire that still shows.