DIY Halloween Banner with Fabric Pennants
Cut felt or cotton pennants from one cardstock template, decorate each with a simple Halloween shape instead of letters, and string them on twine with knots for even spacing.
Tutorial at a glance
Materials
- Felt or cotton in two main colors
- Felt scraps in contrasting colors
- Cardstock, 1 sheet
- Sharp fabric scissors
- Fabric glue or low-temp glue gun
- Twine, about 8 feet (2.4 m)
A DIY Halloween banner made of fabric pennants fills a wall, a mantel or the front of a party table faster than almost any other decoration. Each pennant is a small flag with one simple shape on it, so you can cut a few at a time and string them together when the stack is tall enough.
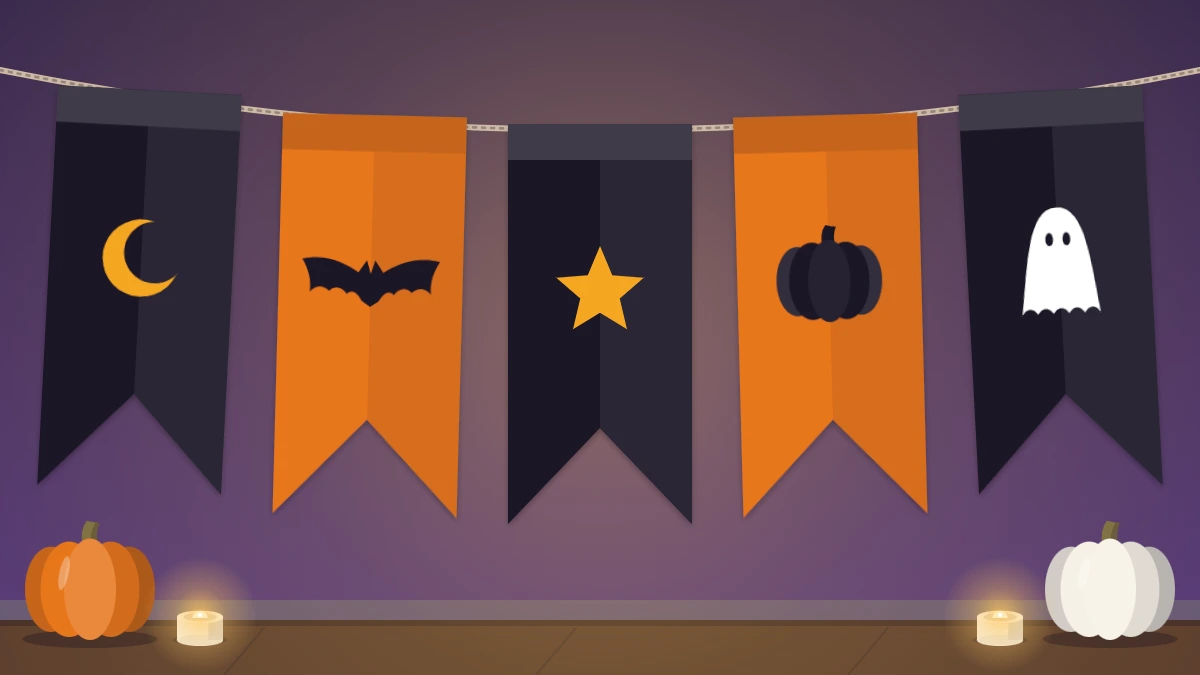
This version uses pictures instead of letters. A moon, a bat, a star, a pumpkin and a ghost repeat along the twine, which means there is no spelling to plan, no spacing to measure and no pennant that only works in one position.
Materials
- Felt or cotton fabric in two main colors, such as black and orange
- Felt scraps in contrasting colors for the shapes (white, cream, yellow, purple)
- One sheet of cardstock for the template
- Sharp fabric scissors, a pencil and a ruler
- Fabric glue or a low-temp glue gun
- Twine or narrow ribbon, the length of your space plus about 2 feet (60 cm) for tying
Felt or cotton?
The fabric decides how much finishing the edges need.
- Craft felt does not fray, cuts cleanly and holds glue well. It is the easiest choice and needs no hemming.
- Cotton gives you prints such as stripes, dots and plaid, but raw edges shed threads. Cut it with pinking shears for a zigzag edge that frays far less, or iron on a lightweight fusible backing before cutting.
- Burlap or canvas looks rustic and hangs flat. A thin line of fabric glue brushed along the cut edge helps hold the weave.
If you enjoy working with felt, the felt Halloween garland uses the same material for strung shapes without pennants.
Make the template
A cardstock template keeps every pennant the same size, which is what makes the finished banner look tidy.
- Draw a rectangle about 5 inches wide and 8 inches tall (13 by 20 cm) on cardstock.
- Mark a line about 1 inch (2.5 cm) below the top edge. This strip is the fold-over flap.
- For a triangle pennant, mark the center of the bottom edge and draw straight lines from that point up to the ends of the flap line.
- For a swallowtail pennant, keep the rectangle and mark a point about 2 inches (5 cm) up from the center of the bottom edge. Draw lines from that point to the two bottom corners and cut out the notch.
- Cut out the template.
Triangles look lively and use less fabric. Swallowtails give more room for the shape and hang straighter.
Cut the pennants
Trace the template onto the back of the fabric with a pencil or chalk and cut just inside the line. To save fabric, turn the template upside down for every second triangle so the pieces nest together.

Alternate two colors along the banner, or use one color for all the pennants and let the shapes carry the contrast.
How many pennants you need
These figures assume pennants about 5 inches (13 cm) wide and are approximate. Leave about 12 inches (30 cm) of bare twine at each end for tying.
| Spacing | Pennants per foot | For 6 feet (1.8 m) of pennants |
|---|---|---|
| Touching, no gap | About 2.5 | About 14 |
| Gap of about 1 inch (2.5 cm) | About 2 | About 12 |
| Gap of about 3 inches (8 cm) | About 1.5 | About 9 |
A banner that hangs in a curve needs more length than one pulled straight, so measure the drop with a piece of twine before you count.
Add the shapes
Keep each shape to roughly 3 inches (8 cm) across so it sits inside the pennant with a clear border. Bold outlines read best from across a room:
- Moon: a crescent in yellow or cream
- Bat: a wide, shallow shape in black on orange
- Star: five points in white or yellow
- Pumpkin: a rounded oval in orange with a tiny brown stem
- Ghost: a soft white teardrop with a wavy lower edge and two black dots
Draw each shape on cardstock first, cut it out and trace it onto felt. For clean curves and inner corners, the guide on how to cut Halloween shapes covers tools and technique in detail.
Glue each shape in the center of the area below the flap line. Use a thin, even layer of glue, press flat and let it set before moving on. Glue guns are an adult job.
Attach the pennants to the twine
- Lay the twine out straight on a table and mark the center.
- Place the middle pennant face down under the twine, with the twine along the flap line.
- Run a line of glue along the top edge of the flap, fold it over the twine and press. Keep glue off the twine itself if you want the pennant to slide for adjusting.
- Work outward from the center, adding pennants to the left and right in turn so the pattern stays balanced.
- Tie a small overhand knot in the twine on each side of every pennant to hold the spacing.
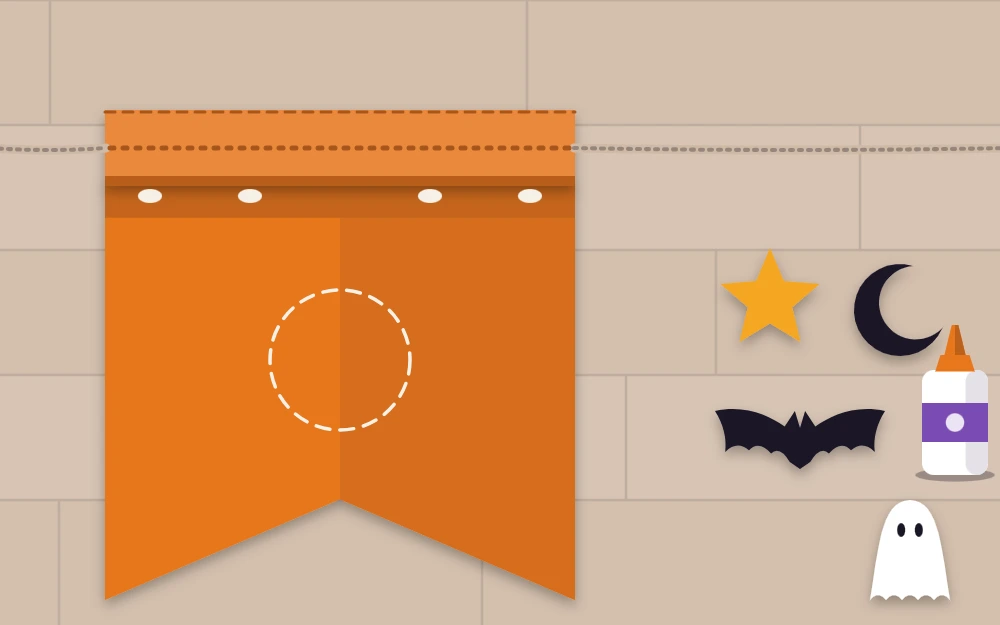
If you prefer stitching, a simple running stitch along the flap in contrasting thread does the same job and adds a handmade detail.
Tip
Lay all the pennants out in order before gluing any of them. It is the easiest way to check that no two matching shapes or colors land side by side.
Hanging and storing the banner
Indoors, hang the banner from removable adhesive hooks at reachable height, with a gentle dip in the middle. It suits a mantel, a bookshelf, a window frame or the front edge of a buffet, where it pairs well with Halloween party table decor.
Keep fabric banners clear of lamps and heaters, and light a mantel display only with flameless options such as battery tea lights. On a covered porch, tie the ends firmly and bring the banner in during wind or rain, since felt holds water and sags.
To store it, fold the banner back and forth in a zigzag with the pennants stacked, and slip it into a flat bag. Wrapping it around a piece of cardboard keeps the twine from tangling.
Frequently asked questions
What size should Halloween banner pennants be?
Around 5 inches wide and 7 to 8 inches tall suits most mantels and walls. Go smaller, about 3 inches wide, for a shelf edge or a cake table, and larger for a wide wall or a covered porch. Whatever size you pick, keep every pennant the same by cutting from one template.
How do I stop cotton pennants from fraying?
Cut them with pinking shears, iron a lightweight fusible backing onto the fabric before cutting, or brush a thin line of fabric glue along each raw edge and let it dry. Felt avoids the problem altogether, which is why it is the usual choice for a quick banner.
Can I reuse the banner next year?
Usually, if it has been kept dry and stored flat. Fold it in a zigzag so the pennants stack, and keep it somewhere cool and out of direct sun, since some felt colors fade. Before hanging it again, check the glued flaps and shapes and press down any that have lifted.