Paper Rosette Fans for a Halloween Party Wall
Accordion-fold paper strips, join them into rosettes, lock each one flat with a center disc and hang three sizes in an overlapping cluster for a party wall.

Tutorial at a glance
Materials
- Colored paper in black, orange and purple
- Ruler and bone folder for scoring
- Scissors or a paper trimmer
- Craft glue and a low-temp glue gun
- Cardstock scraps for center discs
- Thread or thin twine
- Removable adhesive putty or hooks
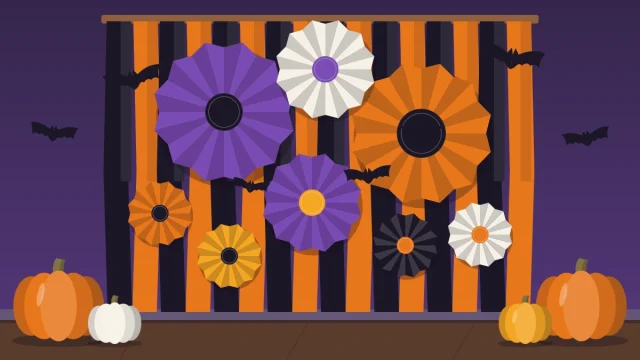
Halloween paper fans fill a party wall faster than almost any other handmade decoration. Each rosette is only a pleated strip of paper closed into a circle, yet a cluster of them in black, orange and purple looks full, layered and deliberate from across the room.
The folding is simple enough to do while you talk, and the supplies are paper, glue and string. What separates a crisp fan from a floppy one comes down to paper weight, even pleats and a firm center, so those get the most attention here.
Paper Weight and Supplies
Medium-weight paper is the easiest to work with. Text-weight colored paper and thin scrapbook paper fold cleanly and hold a pleat. Heavy cardstock makes a sturdy large fan but cracks along the folds unless you score it first, and tissue paper is too soft to hold its shape.
- Colored paper in black, orange and purple, sheets about 12 inches (30 cm) long
- A ruler and a bone folder, or an empty ballpoint pen for scoring
- Scissors or a paper trimmer
- Craft glue or a glue stick, plus a low-temp glue gun for the centers
- Cardstock scraps for center discs and shapes
- Thread or thin twine, and removable adhesive hooks or putty
Cut the Strips: Size Sets Everything
The width of the strip becomes the radius of the fan, so a strip 3 inches (8 cm) wide makes a rosette about 6 inches (15 cm) across. The total length of pleated paper decides how full the circle looks. Too little and the pleats stretch flat; plenty and they stand up sharply.
| Finished fan | Strip width | Strips, 12 in long | Fold width |
|---|---|---|---|
| About 6 in (15 cm) | 3 in | 2 | About 1/2 in |
| About 10 in (25 cm) | 5 in | 3 | About 3/4 in |
| About 14 in (36 cm) | 7 in | 3 or 4 | About 1 in |
Narrow pleats give a fine, detailed fan that suits small sizes. Wide pleats look bold and graphic, and they are quicker to fold on the big ones.
Accordion-Fold the Strips
- Lay a strip face down with a short end toward you.
- If the paper is heavy, score it first: mark the fold width along both long edges, line up the ruler and draw the bone folder across at every mark.
- Fold the short end up by one fold width and crease it firmly.
- Flip the strip over and fold the same amount back the other way.
- Keep flipping and folding to the end, lining up each new pleat with the one before it.
- Run the bone folder or the back of a spoon along the stacked pleats to sharpen every crease.
- Repeat with the other strips for the same fan, keeping the fold width identical.
Finish each strip so that one end points up and the other points down. If both ends point the same way, trim off one pleat. That way, the strips overlap neatly when you join them.

Join the Strips into a Circle
- Glue the last pleat of one strip over the first pleat of the next, so the join hides inside a fold. Hold it for a few seconds.
- Add the remaining strips the same way to make one long pleated band.
- Glue the two free ends together to form a pleated tube, and let the glue set for a couple of minutes.
- Stand the tube on the table, then gently press the top edge down and inward. The tube flattens into a rosette with a small hole in the middle.
Glue the Center Discs, Front and Back
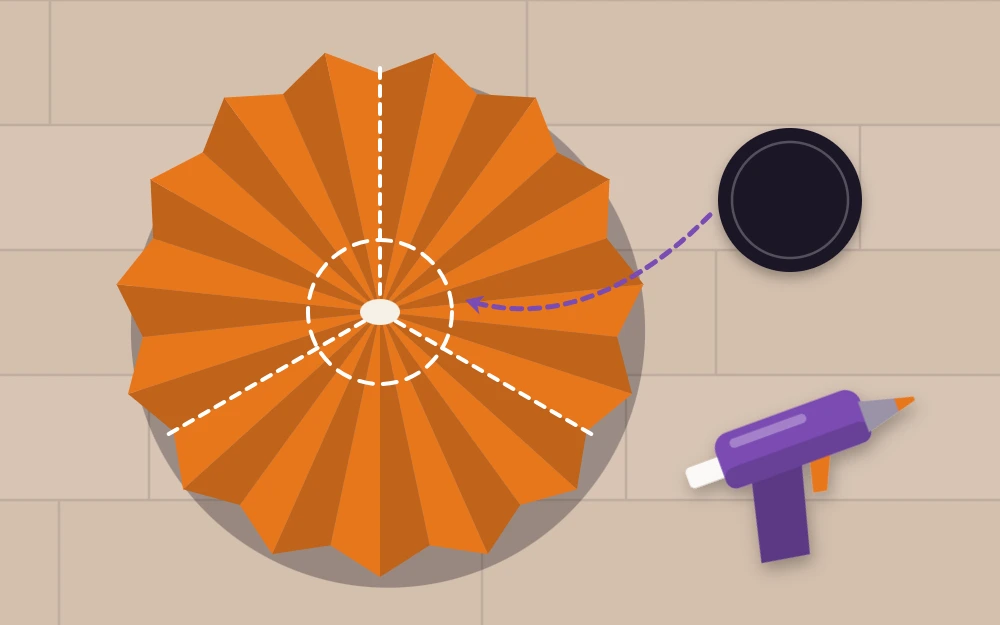
The discs are what lock the fan flat. Cut two circles of cardstock for each rosette, roughly one third of the fan’s width, so a 10-inch fan takes discs a little over 3 inches (8 cm) across.
An adult should handle the glue gun. Squeeze a generous ring of glue around the center of the fan, press the first disc on, and hold it for about 30 seconds while the pleats grip. Turn the fan over and glue the second disc to the back. If you plan to hang the fan on a thread, lay the looped thread under the back disc before you press it down.
Tip
If a fan still tries to lift at the edges, the strip is too short for its width. Add one more pleated strip rather than more glue.
Add a Simple Center Shape
A small silhouette on the front disc turns a plain rosette into a Halloween one. Keep the shapes bold and a little smaller than the disc:
- A black bat on an orange disc
- A pale crescent moon on a black disc
- A round-bodied spider with eight short legs
- A simple pumpkin outline in orange on purple
Decorate about one fan in three and leave the rest plain. Contrast between disc and shape matters more than detail, since most guests will see the wall from several feet away.
Hang Them in an Overlapping Cluster
Make an odd number of fans in three sizes: for example two large, three medium and four small. Then arrange them on the floor before anything goes on the wall.
- Place the largest fans first, off-center and at different heights.
- Tuck the medium fans against them so the edges overlap by about 1 to 2 inches (2.5 to 5 cm).
- Fill the gaps and the outer edge with the small ones.
- Spread the colors so no two fans of the same color and size sit side by side.
- Move the layout to the wall one fan at a time, starting from the middle, using removable adhesive putty or small removable hooks at a height you can reach from the floor.
Test the putty or hooks on a hidden spot first, since painted walls vary. Paper fans are for indoor walls, away from heat and damp.
A cluster like this makes a strong focal point above a buffet or behind a photo spot. For a full photo wall, combine it with the ideas in the DIY Halloween party backdrop guide, and drape a paper Halloween garland underneath to finish the lower edge. Two or three small fans laid flat also echo the wall on the table itself; see Halloween party table decor for the rest of the setting.
After the Party
Fans keep best if they stay flat. Stack them by size in a shallow box with a sheet of paper between each; how well paper holds its color and crispness varies with storage.
Frequently asked questions
What paper is best for rosette fans?
Medium-weight paper, such as text-weight colored paper or thin scrapbook paper, folds cleanly and holds a sharp pleat. Heavy cardstock works for large fans if you score each fold line first so the surface does not crack. Tissue and very thin paper tend to droop, so save those for other party decorations.
Why does my paper fan keep popping open?
Usually the pleated band is too short for the width of the strip, so the pleats are stretched and pull against the glue. Add another pleated strip to the band before closing the circle. Then hold the rosette flat while a center disc is glued on the front and a second one on the back.
How many paper fans do I need for a party wall?
It depends on the space, but an odd number in three sizes fills a wall well. Around nine fans, such as two large, three medium and four small, covers a patch roughly 3 feet wide once the edges overlap. Lay them out on the floor first and make a few more if you see gaps.