Yarn Spider Web Decoration for a Wall or Corner
Stretch yarn spokes between removable hooks, spiral outward with a slight sag and add a pom-pom spider. A corner or wall web from 2 to 5 feet across in under an hour.

Tutorial at a glance
Materials
- Medium-weight yarn in white, black or gray, 1 ball
- Removable adhesive hooks, 5 to 8
- Scissors
- Black yarn for the pom-pom
- Black chenille stems, 4
- Cardboard scrap, about 2.5 inches wide
A yarn spider web fills an empty corner better than almost any other decoration, and it costs one ball of yarn. Unlike the stretchy bagged webbing that clings to everything, a yarn web has a clear, drawn shape: straight spokes, a spiral of drooping threads and a fuzzy spider sitting in the middle.
It goes up in under an hour and comes down in a minute, leaving the wall as it was. You can make it small enough for a bookshelf nook or stretch it across a whole corner of the room.
What you need
- One ball of medium-weight yarn in white, black or gray
- Removable adhesive hooks, about five to eight small ones, or strong removable tape
- Scissors
- For the spider: black yarn, a piece of cardboard and four black chenille stems
Choose the yarn color against your wall. White shows up on dark or colored walls and glows under dim light. Black is sharp on pale walls. Gray is the softest of the three. Smooth yarn gives cleaner lines than a fluffy one.
Choose a size and a spot
Webs from about 2 to 5 feet (60 to 150 cm) across are the most practical. Smaller than that and the knots crowd together; much larger and the spokes need more anchor points than a wall comfortably gives you.
| Web size | Spokes | Approximate yarn |
|---|---|---|
| 2 feet (60 cm) | 5 or 6 | About 15 yards (14 m) |
| 3 feet (90 cm) | 6 or 7 | About 25 yards (23 m) |
| 5 feet (150 cm) | 7 or 8 | About 50 yards (46 m) |
A corner is the easiest place to work, because the two walls and the ceiling line give you natural anchor points and the web gains real depth. On a flat wall, the web becomes a wheel shape with anchors all around. Keep the highest anchor where you can reach it comfortably from the floor, and stay clear of doorways, light fittings and heaters.
Anchor the spokes
The spokes are the frame threads that everything else hangs from. They need to be taut.
- Decide where the center of the web will be. In a corner, it sits out in the open air, roughly a third of the way along from the corner itself.
- Press the adhesive hooks onto the walls around that center, following the instructions on the package and letting them set for the time it states.
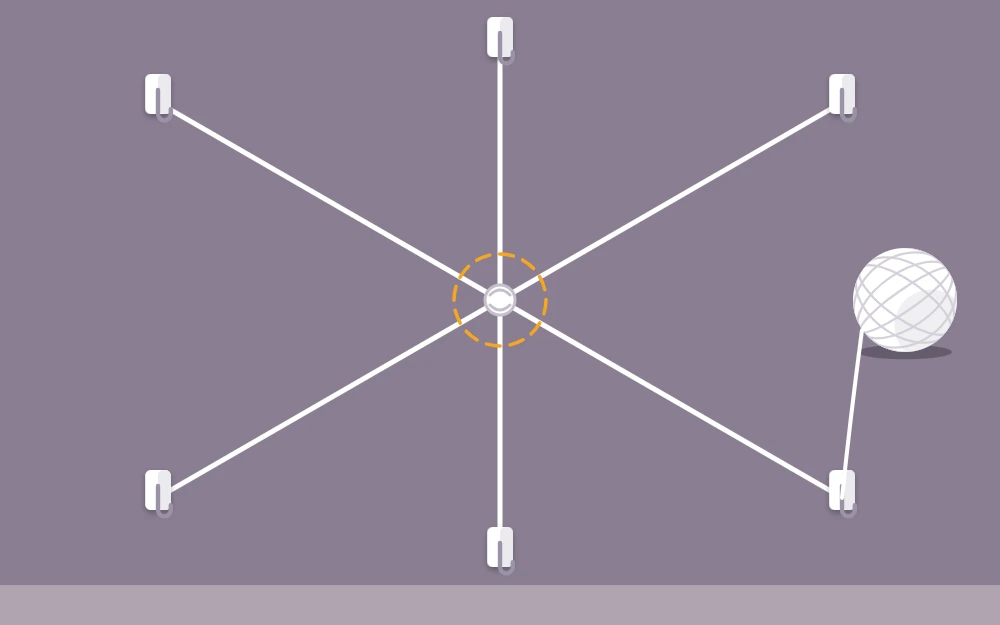
- Tie the yarn to the first hook, run it through the center point and across to the hook most nearly opposite, pull it tight and tie it off. That single line makes two spokes.
- Run a second line between another pair of hooks so that it crosses the first at the center.
- Add a third line, and where the three cross, wrap a short piece of yarn around them several times and knot it firmly. You now have six spokes meeting at one point.
- For an odd number of spokes, tie one extra length from the center knot out to a single hook.
Uneven spacing between the spokes is welcome. Real webs are irregular, and a slightly lopsided frame looks far more convincing than a perfect star.
Tip
If you use tape instead of hooks, tie a knot in the end of the yarn and tape over the knot. The knot stops the yarn from sliding out under tension.
Spiral outward from the center
Do not cut the yarn for the spiral in advance; work straight from the ball, passing it over and under the spokes as you go.
- Tie the yarn end to one spoke about 2 inches (5 cm) out from the center knot.
- Carry it to the next spoke and either wrap it once around the spoke or tie a simple knot. A wrap is quicker and adjustable; a knot stays put.
- Continue around from spoke to spoke until you are back where you began, then step outward by about 3 to 4 inches (8 to 10 cm) and start the next ring.
- Leave a little slack in each span so the thread dips slightly between spokes.
- Widen the gap between rings as the web grows.
- Stop a few inches short of the hooks, tie off on a spoke and trim the end.
That gentle sag is the detail that makes it look like a web instead of a string diagram. Aim for a shallow curve; too much slack and the rings tangle with each other. On a large web, knot at every spoke for the outer rings, since long loose spans slide inward.
Make the pom-pom spider
- Wrap black yarn about 80 to 100 times around a piece of cardboard roughly 2.5 inches (6 cm) wide.
- Slide the loops off, tie a length of yarn very tightly around the middle and knot it twice.
- Cut through all the loops and trim the ball until it is round and dense.
- Lay four chenille stems side by side, twist them together at the middle, and spread the eight ends out as legs.
- Tie the pom-pom onto the twisted middle with the tails of its center yarn.
- Bend each leg up at the body and down again halfway along, like a knee.
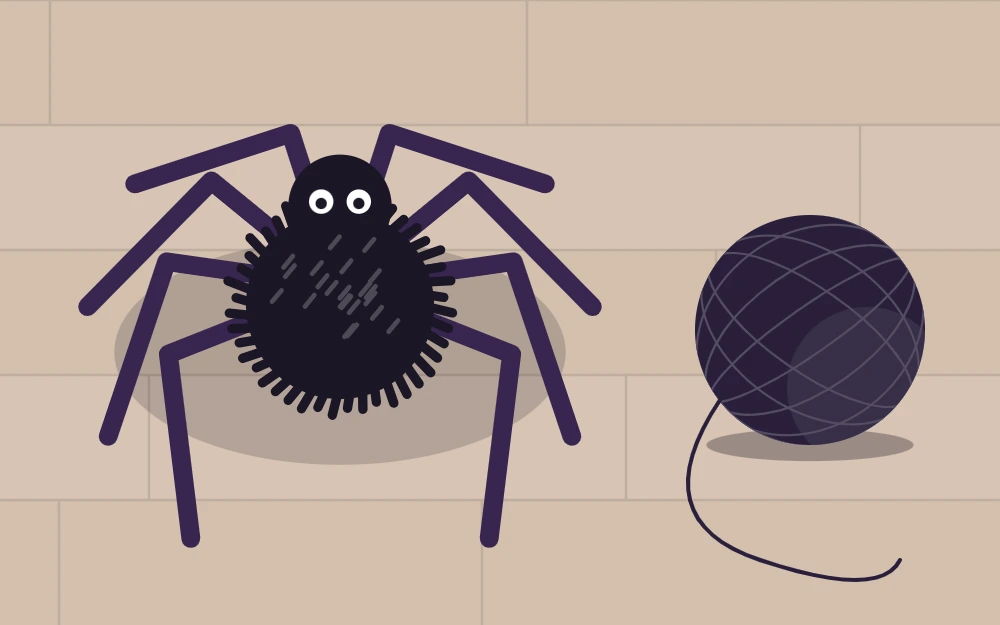
Hook two of the legs over a thread of the web, a little off center, or hang the spider from a single strand of yarn so it dangles below.
Variations and what to pair it with
- Use two strands held together, one white and one gray, for a thicker, dustier line.
- Make a large one as the centerpiece of a Halloween party backdrop, with the spider placed where it will sit beside people’s shoulders.
- Float a few cheesecloth ghost decorations on the shelf or table nearby for a soft white contrast.
The same spoke-and-spiral method works at a smaller scale inside a ring, which is how the spider web hoop wreath is made.
Care and take-down
Keep the web out of walkways and above the reach of young children and pets; long strands of yarn and chenille stems with wire cores are not playthings. Check the anchors every few days and retie any spoke that has gone slack.
To take it down, snip the spokes at the hooks and remove each hook the way its package describes, which usually means pulling the tab slowly straight down along the wall. The yarn can be wound up and used again, and the spider is ready for next year.
Frequently asked questions
How much yarn does a spider web decoration need?
It depends on the size and how close the rings are. As a rough guide, a 2 foot web uses about 15 yards, a 3 foot web about 25 yards and a 5 foot web about 50 yards. One ordinary ball of medium-weight yarn is normally plenty for a single web and a spider.
Will the hooks or tape damage my wall?
Removable adhesive hooks are designed to come off cleanly when you follow the package directions, but results vary with paint type, wallpaper and how fresh the finish is. Test one in a hidden place first, press it on firmly, and remove it slowly by pulling the tab straight down along the wall.
How do I keep the spiral threads from sliding along the spokes?
Tie a simple knot at each spoke instead of only wrapping the yarn around it, especially on the outer rings where the spans are long. Keeping the spokes taut also helps a great deal. If a wrapped ring has already slipped, push it back into place and add a knot there.