Paper Halloween Garland: Chains, Cutouts and Fringe
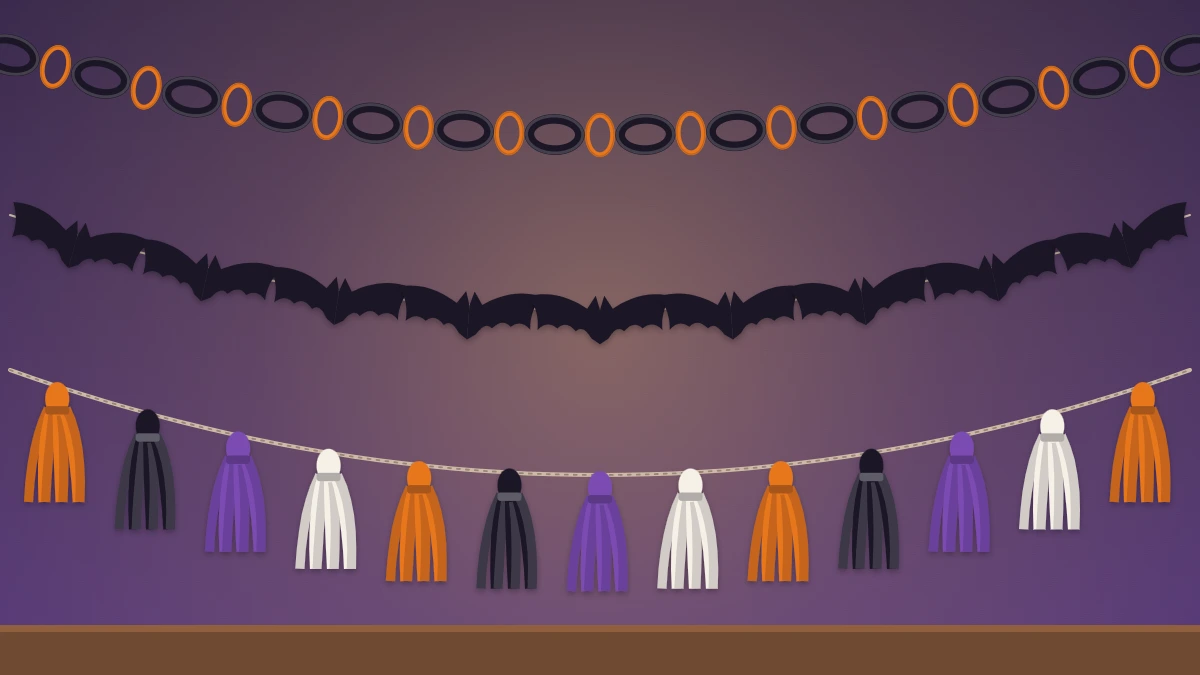
Three quick paper garlands for Halloween: a black and orange chain, an accordion-fold row of connected bats and tissue fringe tassels, plus how to join and hang them without marks.
Tutorial at a glance
Materials
- Black and orange construction paper
- Thin black paper for cutouts
- Tissue paper, 4 to 6 sheets
- Sharp scissors and a ruler
- Glue stick, stapler or clear tape
- Twine, about 6 feet
- Removable adhesive hooks or putty
A paper halloween garland is the quickest way to make a plain wall look ready for a party. Paper is cheap, it comes in exactly the right black and orange, and a full garland takes less time than most people spend choosing one in a shop.
Below are three garlands that use the same small set of supplies: a classic chain, a row of connected cutout bats, and a line of tissue fringe tassels. Each works alone, and the three layered together fill a wall.
Paper and supplies
The weight of the paper matters more than the brand or finish. Each garland wants something different.
| Garland | Paper that works | Avoid |
|---|---|---|
| Chain | Construction paper or light cardstock | Tissue, which collapses |
| Cutout chain | Plain copy-weight or thin construction paper | Cardstock, too thick to cut folded |
| Fringe tassels | Tissue paper | Anything stiff |
You will also need sharp scissors, a ruler, a pencil, twine or thin ribbon, and something to join the paper with.
Glue, stapler or tape
- Glue stick: the neatest finish and nothing shows, but each link has to be held for a few seconds. Good for a slow, tidy job.
- Stapler: by far the fastest, and the strongest on cardstock. The staples are visible up close. An adult should do the stapling or supervise it.
- Clear tape: quick and easy for children, and the best choice for joining cutout chains end to end. It can look shiny under bright light.
Liquid glue is the one to skip. It soaks into thin paper, wrinkles it and takes too long to grab.
Garland 1: the classic paper chain
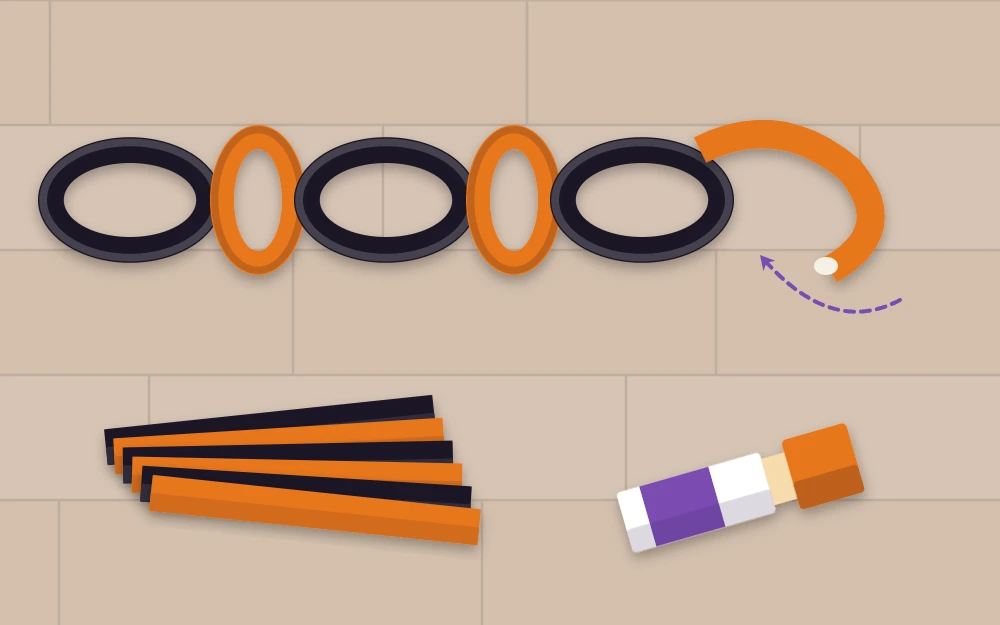
- Cut strips about 1 inch (2.5 cm) wide and 8 inches (20 cm) long from black and orange paper. Roughly 30 strips make about 5 feet (1.5 m) of chain.
- Curl the first strip into a ring, overlap the ends by about half an inch (1 cm) and fasten them.
- Thread the next strip through the ring, close it, and continue, alternating the colors.
- Keep every seam on the same side so the back of the chain can face the wall.
For a change of rhythm, try two black links to every orange one.
Garland 2: the accordion cutout chain
This is the paper-doll trick with a Halloween shape. The secret is that the shape must touch both folded edges, or the chain falls apart into separate pieces.
- Cut a strip of thin black paper about 4 inches (10 cm) tall and as long as your sheet allows.
- Fold it back and forth like a fan into panels about 3 inches (7.5 cm) wide, keeping the edges lined up.
- On the top panel, draw half a bat. Place the center of the body on one folded edge and stretch the wing across so its tip runs off the opposite folded edge.
- Hold the stack firmly and cut through all the layers, leaving the wing tip and the body edge uncut where they meet the folds.
- Unfold gently. You will have a row of whole bats joined at the wing tips.
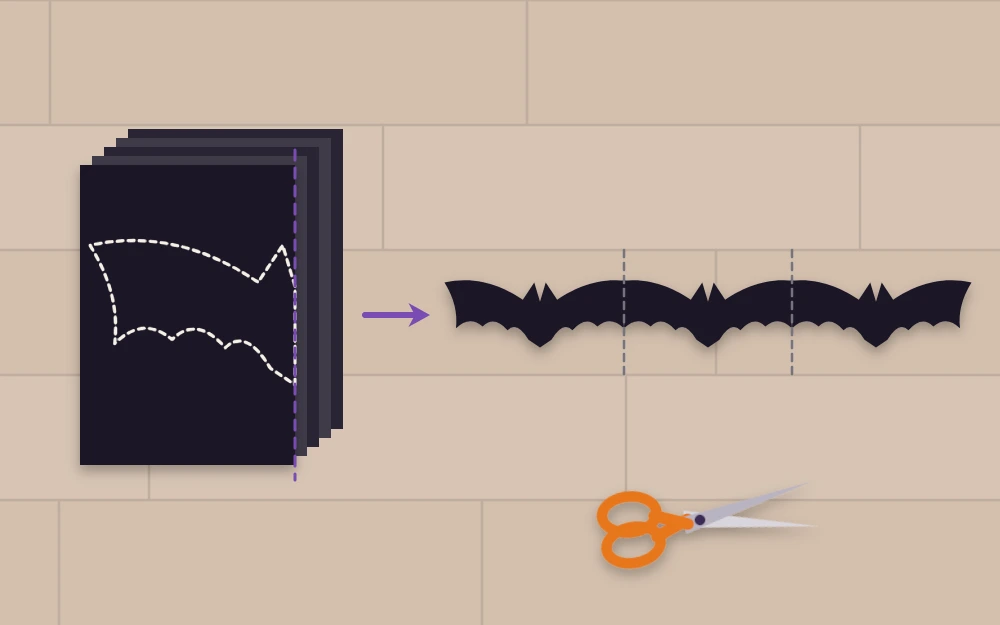
For pumpkins, draw a whole pumpkin on the top panel and let its sides run off both folds by a finger’s width. Use orange paper and keep the stem short.
Limit the stack to about six or eight layers; more than that is hard to cut cleanly and the shapes drift. Make several short chains and join them with a small piece of clear tape on the back. Clean curves through folded paper take a little practice, and the folding and cutting methods carry over directly to Halloween paper fans if you want a matching wall piece.
Tip
Cut a test chain from scrap paper first. It takes a minute and shows at once whether your shape reaches both folds.
Garland 3: tissue fringe tassels
- Stack two sheets of tissue paper and fold the stack in half so the fold runs along the top.
- Cut a fringe from the open bottom edge toward the fold in strips about a quarter inch (0.5 cm) wide, stopping about 1 inch (2.5 cm) short of the fold.
- Open the sheets out flat. The uncut band now runs across the middle with fringe on both sides.
- Roll the paper up along that band, then twist the band tightly into a cord.
- Bend the twisted cord into a loop and secure it with a strip of tape or a twist of its own paper.
- Thread the loops onto twine and space the tassels about a hand’s width apart.
A half sheet makes a small tassel and a full sheet makes a generous one. Alternate black and orange, or add one white tassel in every five to lighten the row.
Hanging without marks
Paper garlands weigh almost nothing, so gentle fixings are enough.
- Use removable adhesive hooks or small pieces of removable adhesive putty at each end and one in the middle for longer runs.
- Hang from things that are already there: a curtain rod, a mantel edge, a shelf bracket or a picture frame.
- Let the garland dip in a shallow curve instead of pulling it tight. It looks better and puts less strain on the ends.
- Keep everything at a height you can reach from the floor, and well clear of light bulbs, heaters and the stove.
Test putty or tape on a hidden spot first if your walls are freshly painted or papered, and follow the label on any adhesive hook when you remove it.
Safety note
Paper and tissue belong only near flameless lighting. If you want a glow on the mantel below a garland, use battery LED candles and keep the paper away from anything hot.
Layering and storing
To layer the three, hang the chain highest with the deepest curve, the bats in the middle, and the tassels lowest and almost straight. Staggering the end points by a few inches keeps the wall from looking like ruled lines. The same stack works well behind a food or photo table as part of a Halloween party backdrop.
Paper garlands are indoor decorations and will not cope with damp. To keep them, fold cutout chains back along their creases, wind the paper chain loosely into a box, and lay tassels flat. If you would like something sturdier to bring out year after year, a felt Halloween garland is the natural next project.
Frequently asked questions
Why did my cutout chain fall apart into separate shapes?
The shape did not stay attached at the folds. Each figure has to run off both folded edges of the stack, and those parts must be left uncut. Redraw the shape a little wider so a section about a finger's width crosses each fold, then cut again and unfold carefully.
How many strips do I need for a paper chain?
With strips about 8 inches long, each link adds a little under 2 inches to the chain, so roughly 30 strips give about 5 feet. Longer strips make bigger rings and cover distance faster. Cut a few extra in each color, since the last links decide how the pattern ends.
Can a paper garland be used outside?
Paper and tissue soften and tear quickly in damp air, so these garlands are best kept indoors. A fully covered porch on a dry, still evening can work for a few hours, but bring the garland inside afterward. For outdoor use, choose a sturdier material and check how it handles moisture.